This page may contain links that earn us a commission at no extra cost to you. Click here to know more.
Common Studio Monitor Problems & How to Fix Them
From buzzing and crackling to no sound at all—this guide walks you through the most common studio monitor problems and how to fix them fast.
- May 2, 2025
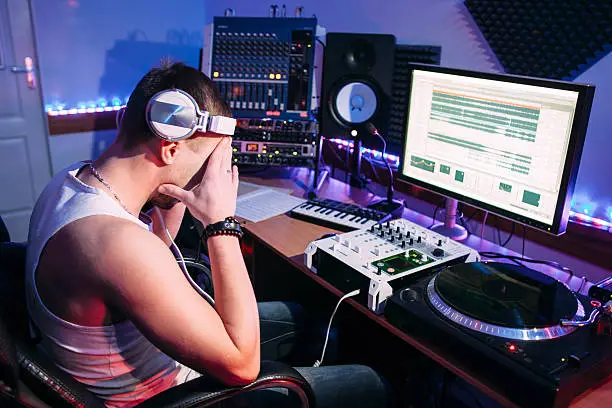
Why Studio Monitor Problems Matter
When you invest in the best studio monitors, you expect clear, accurate sound. However, even high-quality monitors like the Yamaha HS8 or KRK Rokit RP7 G4 can run into issues if they aren’t set up or maintained correctly.
Small problems—like buzzing, distorted audio, or uneven sound—can ruin your mixing and listening experience. Thankfully, most of these issues have simple fixes. Knowing how to troubleshoot can save you money, time, and a lot of frustration.
In this guide, I’ll walk you through the most common studio monitor issues, what causes them, and practical, proven solutions. Whether you’re using budget monitors like the M-Audio BX5 D3 or professional ones like the Neumann KH310, this troubleshooting checklist will help you keep your sound on point.
📚 Related: If you’re still setting up your space, check out How to Set Up Studio Monitors for the Best Sound for a complete setup guide.
Common Studio Monitor Problems
Even the best studio monitors can sound off in certain environments. The problem isn’t always with the gear—it’s often how and where you’re using it. If your mixes sound great in your studio but fall apart on other systems, chances are you’re dealing with common monitoring issues.
When I started using the Yamaha HS5, I assumed its clarity alone would improve my mixes. But I quickly learned that placement, acoustics, and calibration matter just as much as monitor quality. If your sound feels “off,” these factors might be the culprit—not your monitors.
In this guide, we’ll look at the most common studio monitor problems that home producers and pros alike face, and how to fix them with practical, proven solutions.
1. Studio Monitors Humming or Buzzing
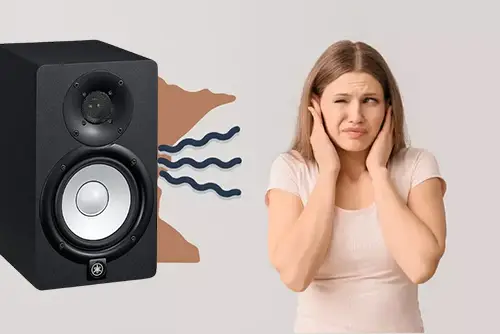
There’s nothing more frustrating than powering up your studio and being greeted with a low hum or an annoying buzz from your speakers. This is one of the most common studio monitor issues and is usually tied to electrical interference, poor cabling, or ground loop problems—especially in home studio setups.
Causes of Buzzing:
- Ground loops: Occur when your equipment is connected to different grounding points, creating a loop that induces hum.
- Bad cables or loose connections: A faulty XLR or TRS cable can introduce noise into the signal chain.
- Interference from power sources: Running audio cables too close to power cords or unshielded power adapters can introduce unwanted hum.
Quick Fixes:
- Use balanced cables (TRS or XLR) to reduce interference. Check if your interface and monitors support them.
- Plug all devices into the same power outlet using a power conditioner to eliminate ground loop issues.
- Try ground loop isolators or a DI box with a ground lift if the issue persists.
- Test each component (audio interface, cables, monitors) individually to isolate the source of the noise.
Ground loop problems are especially common when connecting your studio monitors directly to a laptop. For a more stable connection setup, refer to our guide on how to connect studio monitors to laptop.
2. One Monitor Louder Than the Other
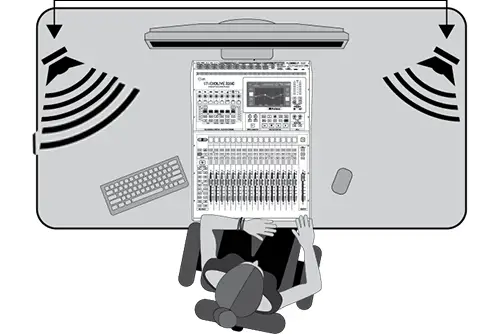
If one of your studio monitors sounds noticeably louder than the other, it can throw off your stereo imaging and lead to inaccurate mixes. This imbalance is more common than you’d think and often stems from simple issues like cable problems or misconfigured audio interface settings.
Common Causes:
- Cable issues: A loose or damaged cable (especially XLR or TRS) can reduce signal flow to one monitor.
- Audio interface settings: Check your interface’s pan/balance controls or software mixer—one channel might be set higher.
- Internal monitor problems: Rarely, the speaker itself may have a blown driver or internal amp fault.
- Room placement: Uneven positioning or reflection can sound like a volume imbalance, even when output is equal.
How to Fix the Imbalance:
- Swap the monitor positions (left to right) to see if the issue stays with the speaker or the channel.
- Test different cables—a faulty cable could be lowering signal on one side.
- Check your audio interface’s control panel (especially if using software mixers like Focusrite Control or Universal Audio Console).
- Measure with pink noise and an SPL meter or calibration tool to match volume levels.
- Use monitor calibration plugins if needed for more accurate balancing.
Want to be sure your monitors are well-matched from the start? Explore our Best Studio Monitor Brands guide to see which brands offer consistency and precision straight out of the box.
3. No Sound from Studio Monitors
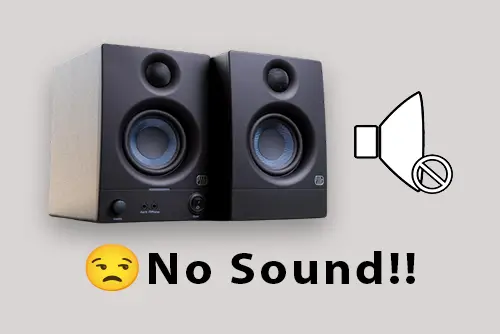
Few things are more frustrating than setting everything up perfectly—only to hear nothing. If your studio monitors aren’t producing any sound, don’t panic. The issue is often simple and easily resolved with a quick checklist.
Common Causes:
- Incorrect input/output routing: Your DAW or audio interface might not be sending the signal to the right output.
- Loose or faulty cables: A disconnected or damaged cable (especially balanced TRS/XLR) could cut off the signal path entirely.
- No power: Simple, but often overlooked—double-check that your monitors are plugged in and switched on.
- Interface not selected in your computer settings: Make sure your audio interface is selected as the main output device in both your system and DAW.
Troubleshooting Checklist:
- ✅ Check all connections — Confirm that power cables and input cables are securely attached.
- ✅ Test the monitors with another source — Try plugging them into a phone or different output to rule out monitor failure.
- ✅ Review your audio interface settings — Use the control panel to confirm correct routing and volume levels.
- ✅ Inspect DAW output settings — Your project might be sending audio to a disabled output channel.
- ✅ Swap cables and inputs — Eliminate cable or input port issues by testing different ones.
Common Causes:
- Incorrect input/output routing: Your DAW or audio interface might not be sending the signal to the right output.
- Loose or faulty cables: A disconnected or damaged cable (especially balanced TRS/XLR) could cut off the signal path entirely.
- No power: Simple, but often overlooked—double-check that your monitors are plugged in and switched on.
- Interface not selected in your computer settings: Make sure your audio interface is selected as the main output device in both your system and DAW.
Troubleshooting Checklist:
- Check all connections — Confirm that power cables and input cables are securely attached.
- Test the monitors with another source — Try plugging them into a phone or different output to rule out monitor failure.
- Review your audio interface settings — Use the control panel to confirm correct routing and volume levels.
- Inspect DAW output settings — Your project might be sending audio to a disabled output channel.
- Swap cables and inputs — Eliminate cable or input port issues by testing different ones.
For a full guide on correctly hooking up your gear, read: How to Set Up Studio Monitors
4. Crackling or Distorted Sound
Hearing static, crackles, or distortion from your studio monitors? This is usually caused by interference, bad cables, or issues in your audio chain—and not necessarily a sign your monitors are broken.
Common Causes:
- Worn-out or low-quality cables – Unshielded or damaged cables can introduce noise and cause crackling.
- Audio interface issues – An overloaded driver or incorrect buffer size might distort the signal.
- Electrical interference – Other electronics, especially wireless devices or power adapters, can introduce noise into your system.
- Overdriven input signal – Feeding a hot signal into your monitors may cause clipping or distortion.
How to Fix It:
- 🔌 Swap your cables – Try different XLR or TRS cables to isolate the problem.
- 🎛️ Check gain staging – Ensure levels aren’t too hot at the interface or in your DAW.
- 🧰 Update or reinstall your audio drivers – Outdated or buggy drivers can cause digital distortion.
- 🔇 Isolate your power supply – Plug your monitors into a different outlet or power conditioner to reduce electrical noise.
- 🧪 Test with another input source – This helps determine if the issue is in the monitor or earlier in the signal chain.
Common Causes:
- Worn-out or low-quality cables – Unshielded or damaged cables can introduce noise and cause crackling.
- Audio interface issues – An overloaded driver or incorrect buffer size might distort the signal.
- Electrical interference – Other electronics, especially wireless devices or power adapters, can introduce noise into your system.
- Overdriven input signal – Feeding a hot signal into your monitors may cause clipping or distortion.
How to Fix It:
- Swap your cables – Try different XLR or TRS cables to isolate the problem.
- Check gain staging – Ensure levels aren’t too hot at the interface or in your DAW.
- Update or reinstall your audio drivers – Outdated or buggy drivers can cause digital distortion.
- Isolate your power supply – Plug your monitors into a different outlet or power conditioner to reduce electrical noise.
- Test with another input source – This helps determine if the issue is in the monitor or earlier in the signal chain.
Some crackling may also be due to room acoustics and reflections, which can be solved with proper setup. See: Acoustic Treatment Tips
5. Excessive Bass or Treble

If your mixes sound overly boomy or shrill, your studio monitors may be outputting too much bass or treble—but the culprit is often your room acoustics or monitor placement, not the monitors themselves.
Common Causes:
- 🧱 Poor room acoustics – Small rooms with hard surfaces can exaggerate low or high frequencies.
- 📍 Monitors placed too close to walls or corners – This increases bass response unnaturally (called boundary boost).
- 🎚️ Incorrect monitor tuning or EQ settings – Some monitors have rear-panel EQ switches that may be set wrong.
Solutions:
- 📏 Move monitors away from walls – At least 6–12 inches of space can drastically reduce bass exaggeration.
- 🎯 Use acoustic treatment – Add bass traps in corners and absorption panels at reflection points. Learn more in this setup guide.
- 🔄 Experiment with toe-in and height – Improper angling or height can affect perceived treble clarity.
- ⚙️ Adjust EQ settings on your monitors – Use built-in tuning controls if available (e.g., LF/HF trim).
- 🧪 Try reference tracks – Play familiar, professionally mixed songs to judge the tonal balance of your space.
Common Causes:
- Poor room acoustics – Small rooms with hard surfaces can exaggerate low or high frequencies.
- Monitors placed too close to walls or corners – This increases bass response unnaturally (called boundary boost).
- Incorrect monitor tuning or EQ settings – Some monitors have rear-panel EQ switches that may be set wrong.
Solutions:
- Move monitors away from walls – At least 6–12 inches of space can drastically reduce bass exaggeration.
- Use acoustic treatment – Add bass traps in corners and absorption panels at reflection points. Learn more in this setup guide.
- Experiment with toe-in and height – Improper angling or height can affect perceived treble clarity.
- Adjust EQ settings on your monitors – Use built-in tuning controls if available (e.g., LF/HF trim).
- Try reference tracks – Play familiar, professionally mixed songs to judge the tonal balance of your space.
Explore more about choosing the right monitor size and placement in our Studio Monitor Buying Guide for better clarity and balance.
Looking for studio monitors that offer well-balanced sound for untreated rooms? See our picks in Best Budget Studio Monitors with excellent tuning flexibility.
Preventing Studio Monitor Issues
Avoiding studio monitor problems isn’t just about troubleshooting — it’s about preventive care. A few proactive habits can keep your monitors performing at their best and help you avoid frustrating issues like buzzing, uneven sound, or distortion.
Regular Maintenance Tips
- Dust your monitors regularly with a dry microfiber cloth — dust buildup can block vents and affect heat dissipation.
- Inspect cables and connections monthly for wear and tear. Replace any frayed or bent connectors.
- Turn off your monitors when not in use to reduce long-term wear on internal components.
Looking for monitor models built for long-term reliability? Our Best Professional Studio Monitors guide highlights rugged options trusted in pro studios.
Smart Cable Management
- Use quality balanced cables (XLR or TRS) to reduce interference.
- Label cables and use Velcro ties or cable sleeves to avoid messy tangles and accidental yanks.
- Keep power cables and audio cables separate to minimize hum or noise caused by electromagnetic interference.
Need help identifying the right cables? See our setup instructions in the Studio Monitor Setup Guide.
Importance of Proper Monitor Isolation
Monitors placed directly on your desk can cause vibrations that muddy your low-end and distort what you hear. Use:
- Monitor isolation pads or stands to decouple the speakers from the desk or surface.
- Sturdy stands to position monitors at ear level, improving clarity and stereo imaging.
Explore top-rated monitors and accessories for home setups in our Best Studio Monitors guide — we highlight options that pair well with isolation gear.
Calibration and Level Matching
Even the best monitors need to be calibrated for your room:
- Match monitor levels with a sound level meter or calibrated pink noise to ensure balanced stereo output.
- Set consistent listening volumes to avoid mixing too loud or too soft — both of which can skew your perception.
For a full guide on how to calibrate and control your listening environment, head over to How to Calibrate Your Studio Monitors.
FAQs About Studio Monitor Issues
Why are my studio monitors buzzing or humming?
Buzzing or humming is usually caused by ground loop issues, unbalanced cables, or electrical interference from nearby devices.
Use balanced cables (XLR or TRS) and isolate power sources to reduce interference.
You can also read our detailed section on studio monitor buzzing for troubleshooting tips.
How do I fix crackling in my studio monitors?
Crackling is often caused by damaged cables, driver issues, or a bad audio interface. Start by swapping out your cables and checking your interface connection.
If you’re looking for reliable audio gear, visit our Best Studio Monitors guide for tested product recommendations.
One of my studio monitors isn't working. what to do?
When only one monitor plays, it’s usually a cable, output setting, or speaker configuration issue.
- Swap cables between monitors to test for signal flow.
- Check panning and output in your DAW or interface.
Refer to our guide on one studio monitor louder for a full checklist.
Should I calibrate my studio monitors?
Yes — basic calibration ensures your monitors output balanced levels.
- Use pink noise or reference tracks to match speaker volumes.
- Adjust EQ settings or room treatment to fix frequency imbalances.
Check out our Studio Monitor Setup Guide for calibration techniques.
What gear should I buy to avoid common issues?
- Balanced audio interface
- High-quality cables
- Isolation pads or stands
- Cable tester
You’ll find gear recommendations in our Studio Monitor Buying Guide and brand reviews.
Conclusion: Fixing Monitor Issues for Better Sound
Studio monitor issues can be frustrating—but the good news is that most problems have simple solutions. Whether it’s buzzing, imbalanced sound, or no output, learning how to spot and fix these common issues early can save your time, money, and your mix.
The key is to approach your setup methodically:
- Check your cables and connections.
- Experiment with placement and room acoustics.
- Don’t skip calibration and maintenance.
If you’re still struggling after troubleshooting, it might be time to upgrade your gear. Explore our Best Studio Monitors guide for top-rated options or discover the Best Studio Monitor Brands trusted by pros. And for a full walkthrough on setup, don’t miss our Studio Monitor Setup Guide.
Great sound starts with smart choices—so stay curious, test often, and let your ears guide you.


