
Studio Monitor Buying Guide – What to Look for & How to Choose
With year of expereince in the audio industry I give you a detailed guide on buying studio monitors, placement of these and common mistakes to avoid to get the best of these.
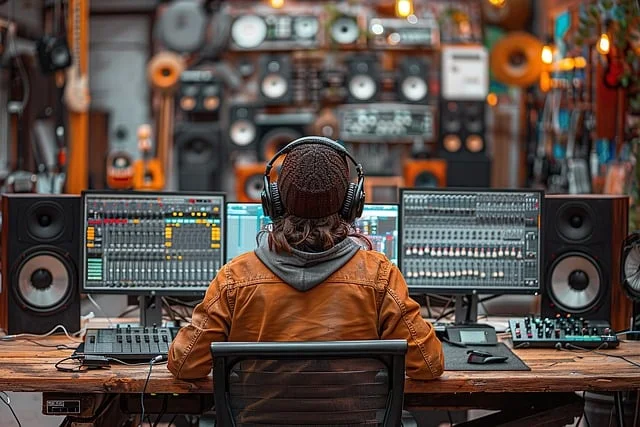
1. What Are Studio Monitors & Why Do You Need Them?
Are you someone who is a
- Music producer or Audio Engineer
- Podcaster or voiceover artist
- Audiophile or home studio enthusiast
If your answer is yes to any or all the above questions, then studio monitors are exactly what you need. But wondering what are they? Continue to read further but you can also directly jump to the key factors to consider before buying a studio monitor or the common mistakes to avoid when using studio monitors.
Studio Monitors vs. Regular Speakers
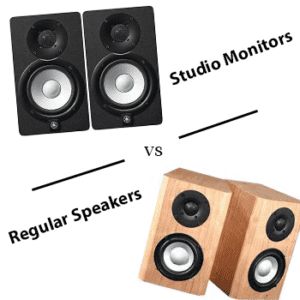
Listening to music on a regular speaker is like watching a movie with extra color saturation and effects but studio monitors are like watching the same movie in real life colors as intended by the director.
Studio monitors produce a “flat” sound. Meaning, they don’t boost any frequencies. Listening through them is like watching the movie exactly as the director intended.
What is a studio monitor used for?
A studio monitor is used for accurate sound reproduction in music production, mixing, and editing. Unlike normal speakers, they give a true, uncolored representation of audio.
2. Key Factors to Consider When Buying Studio Monitors
The most important factors before buying studio monitors are listed below and will see each one in detailed sections.
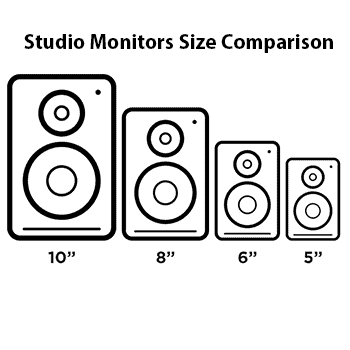
Monitor Size – Does Bigger Mean Better?
The first key factor is studio monitor’s size. Studio monitors are labeled as 5-inch, 8-inch, or even 10-inch. Do you wonder what they actually mean?
Make sure the tweeters in the monitors are at ear level when you’re sitting. More deviation will result in less accurate frequency balance.
What Does "Monitor Size" Refer To?
To simply put, it is the studio monitor’s woofer diameter. The larger it is, the more bass it can produce. But remember bigger isn’t always better!
What size monitors for home studio?
5-inch monitors are ideal for small home studios. 8-inch or 10-inch monitors are best for large rooms, giving a fuller sound.
Which Size is Best for You?
| Monitor Size | Best For | Pros | Cons |
|---|---|---|---|
|
5-Inch |
Small home studios, bedroom setups |
Clear mids & highs, compact size |
Weak bass, not ideal for bass-heavy music
|
|
8-Inch |
Medium-sized rooms, balanced mixing |
Better bass response, good detail |
Requires more space, may need acoustic treatment |
|
10-Inch+ |
Professional studios, large treated rooms |
Deep bass, full sound spectrum |
Expensive, not suitable for small untreated rooms |
Frequency Response – Why Flat is Best
Now you’ve figured out the right monitor size. Let’s talk about one of the most important factors – frequency response. If you’re serious about mixing and mastering, this is a game changer.
From my own experience, when I first switched from regular speakers to studio monitors, I was shocked by the difference. My old speakers made everything sound “full” and exciting, but when I played the same track on a Yamaha HS8, I suddenly noticed subtle details—and even mixing mistakes—I had never heard before. That’s the power of flat frequency response!
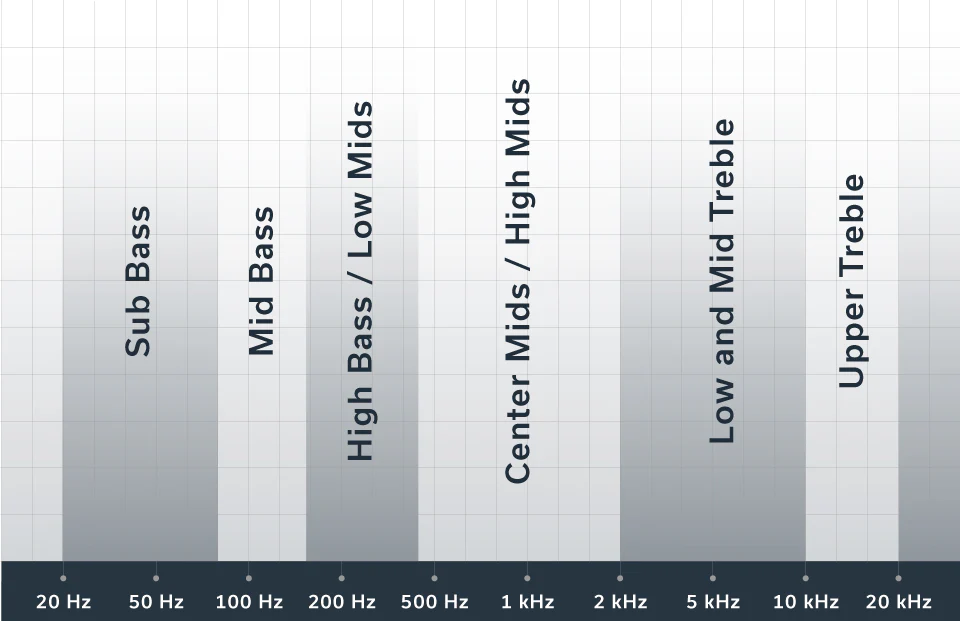
What is Frequency Response?
In sound we have frequencies – bass, mids and treble. The factor that determines how accurately studio monitors reproduce sound across these frequencies is the frequency response. Regular speakers often boost bass or treble, but studio monitors aim for a flat frequency response. They tend to reproduce sound exactly as it is recorded.
Why is Flat Response Important?
| Speaker Size | Sound Output | Best For |
|---|---|---|
|
Regular Speakers |
Often enhance bass or treble for a more exciting sound. |
Casual music listening, home theaters. |
|
Studio Monitors (Flat Response) |
Aim for neutral, uncolored sound, so you hear every detail. |
Music production, mixing and mastering. |
How to Choose the Right Frequency Response
- If you work with bass-heavy music, you might need larger monitors (8” or 10”) or even a subwoofer (do studio monitors need a subwoofer).
- If you have a small untreated room, a 5-inch monitor might be a better choice to avoid muddy low-end buildup.
- Always check the frequency range of a monitor before buying. A wider range means better accuracy across lows, mids, and highs.
Power & Wattage – Does It Matter?
Now that you know how frequency response works, let’s talk about power and wattage. Many beginners assume that higher wattage = better sound, but that’s not always the case. Let’s break it down.
What is Wattage in Studio Monitors?
Wattage refers to the power output of your studio monitors. A higher wattage doesn’t just mean “louder” speakers—it also impacts sound clarity, dynamic range, and headroom.
| Wattage | Best For | Example Monitors |
|---|---|---|
|
Below 50W |
Small home studios, casual mixing |
|
|
50W – 100W |
Mid-sized studios, semi-professional use |
|
|
100W+ |
Large studios, professional production |
How Much Power Do You Really Need?
- For small home studios (bedrooms, apartments) → Monitors under 50W are usually enough. Example: M-Audio BX5 D3
- For medium-sized rooms (treated spaces, small studios) → 50W-100W is ideal. Example: PreSonus Eris E5
- For large, professional studios → 100W+ provides better headroom and clarity. Example: Neumann KH310
Does Higher Wattage Mean Louder Sound? (Common Myth)
Not necessarily. A higher-wattage monitor gives you more headroom, meaning you can play sounds at different volumes without distortion. But if you’re working in a small untreated room, ultra-high wattage can cause unwanted reflections and muddy sound.
To Summarize:
- Choose wattage based on your room size, not just loudness.
- Higher wattage = more headroom, not necessarily better sound.
- Pick a monitor that suits your studio setup for accurate mixing.
Active vs. Passive Monitors – What’s the Difference?
Now you know how to choose the right monitor size. The next important decision is whether to go with active or passive studio monitors. But what does it mean?
Active vs. Passive Monitors Explained
| Type | How It Works | Best For |
|---|---|---|
|
Active Monitors |
Have a built-in amplifier, so they don’t need extra equipment. Just plug them in and start using them. |
Beginners, home studios, and producers who want a simple setup. |
|
Passive Monitors |
Require an external amplifier to power them. You must match the amp’s power with the monitor’s needs. |
Professionals who want full control over their sound system. |
Which One Should You Choose?
From my experience, if you’re just starting out, active monitors are the easiest option. When I was a beginner, I still remember testing the Yamaha HS5. It’s an active monitor. Within minutes, it was up and running without any extra amp or complicated setup.
On the other hand, passive monitors offer more flexibility. Passive monitors need separate amplifiers. In my experience with one of these, I had more control over the sound. Also, it took time to get everything properly balanced. This setup is better suited for professionals who want to fine-tune every detail.
Do studio monitors need an audio interface?
Usually, active monitors don’t need an audio interface to work with. If you have a budget, then using one will improve the sound quality and connectivity options.
You can check on how to connect audio interface to studio monitors in Studio Monitors Set Up Guide 2025.
Nearfield vs. Midfield Monitors – Which One Do You Need?
Now that we’ve covered monitor size, active vs. passive monitors, and frequency response, let’s move on to nearfield vs. midfield monitors. Choosing the right type depends on your studio size and listening distance.
What’s the Difference Between Nearfield and Midfield Monitors?
| Type | Listening Distance | Best For |
|---|---|---|
|
Nearfield Monitors |
Designed to be placed close to the listener (3-5 feet away). |
Small home studios, personal workspaces. |
|
Midfield Monitors |
Placed farther away (6-10 feet) and require a larger room. |
Professional studios, treated rooms. |
Which One is Best for You?
For home studios, nearfield monitors are usually the best choice. In my initial days in the audio industry, I had a small room which was my home studio I went with PreSonours Eris E5. It is a near-field monitor, and I am glad about this choice. Because they are designed for close-up listening, they reduce the impact of room acoustics—great if you don’t have acoustic treatment.
Another great choice is the M-Audio BX5 D3, which is popular among beginner producers. It delivers clear and balanced audio without requiring a perfectly treated room.
Midfield monitors, on the other hand, need more space and proper acoustic treatment. I remember testing the Neumann KH310 in a well-treated studio, and the sound felt more natural and spacious. But when I tried them in a smaller untreated room, the reflections from the walls made the sound muddy.
Another powerful midfield option is the PMC DB1 Gold—a passive monitor that provides incredible sound detail when paired with the right amplifier. However, this setup is better suited for professionals looking for precise sound control.
To Summarize:
- If you’re setting up a home studio, go for nearfield monitors like PreSonus Eris E5 or M-Audio BX5 D3.
- If you have a larger, well-treated room, midfield monitors like Neumann KH310 or PMC DB1 Gold might be better.
- Proper speaker positioning and room treatment make a big difference—more on that in the next section!
3. Common Mistakes to Avoid When Using Studio Monitors
As a beginner we tend to make lot of mistakes that hurt our journey as an audio engineer. We learn from mistakes by trial and error. But since you are here you can leapfrog them and be ahead of others. Below are the common mistakes that I have covered in this section in details:
- Ignoring Room Acoustics
- Placing Monitors Incorrectly
- Listening at the Wrong Volume
- Not Using an Audio Interface
For a complete guide on all the mistakes to avoid you can check our guide on common studio monitor problems.
Ignoring Room Acoustics – Why It Ruins Your Sound
When I was a beginner my focus was on buying the best studio monitors available on the market. Little I knew about room acoustics, which was an expensive mistake. I am here to shed some light on the importance of room acoustics
How Room Acoustics Affects Sound Quality
Sound travels in waves. When it hits an object, it creates a reflection and a standing wave which causes a different sound than the original sound. As a result, it can lead to any of the following:
- High bass – Low frequencies get boosted, making mixes sound muddy.
- Troubled treble – High frequencies bounce off hard surfaces, creating an unpleasant sound.
- Uneven midrange – Some notes sound louder than others, making it hard to mix accurately.
How to Improve Your Room Acoustics
Choose the Right Monitor Placement
When I first tested the Yamaha HS5, I placed it directly against the wall. The bass was overwhelming. So, try not to place monitors too close to the walls and at the corners. These placements will make the sound worse. The simple remedy is to place them 12 inches away from the wall. If possible, try using monitor isolation pads to reduce vibrations. In my case this worked great.
Add Acoustic Treatment.
You don’t need a professional studio, but adding some bass traps, acoustic panels, and diffusers will improve sound clarity. Focus on treating first reflection points (side walls and ceiling) to reduce echoes.
Avoid Mixing in an Untreated Room
If your room has bare walls and a hard floor, the sound will bounce around too much. Adding a rug, bookshelf, or even curtains can help absorb some reflections.
Does Room Acoustics Matter for Small Studios?
Yes! Anyone in the audio production world would agree. Even if you’re mixing in a bedroom or small home studio, a few adjustments can make a huge difference.
Worried about the set up? You can take care of it by reading the studio monitor setup guide.
Placing Monitors Incorrectly
Initially when I was a beginner, I thought studio monitors sound great independent of their positions. Big mistake. Poor placement can ruin stereo imaging, distort frequencies, and lead to inaccurate mixes.
The Right Way to Position Your Studio Monitors

Keep Them at Ear Level
Make sure the tweeters in the monitors are at ear level when you’re sitting. More deviation will result in less accurate frequency balance.
Your head with two monitors should form an equilateral triangle. Distance between the speakers and the distance between the speakers’ pair and you should be same as in the image. This would give an accurate sweet spot and ensure balanced stereo imaging.
Follow the Equal-Sided Triangle Rule
Angle the Monitors Towards You
Position them in such a way they point directly at your ears. This can be achieved by positioning it 30 degrees inwards. This helps maintain proper sound focus.
Avoid Placing Monitors Against Walls or in Corners
As already mentioned, keep them at least 12 inches away from walls to avoid unwanted reflections.
Quick Fixes for Better Placement
- Use Monitor Stands or Isolation Pads – These helps reduce vibrations and improve accuracy.
- If Using a Desk, Tilt Them Slightly Upwards – This ensures the tweeters align with your ears.
- Experiment with Placement – Even small adjustments can improve the listening experience.
Listening at the Wrong Volume
Audio can be either music or bad sound. The difference lies in the volume. Even the best music can become bad sound with too high volume. When I started mixing using my Yamaha HS 8, I would blast monitors at high volume. Terrible mistake because when the mix sounded great at high levels it was sounding bad on normal speakers. Everything seemed like the vocals, bass were out of sync. I learned volume matters more than you think.
The ideal listening Volume for mixing
The volume of a normal conversation lies between 75-85 db SPL. If you can keep the volume at this range, you can hear the true balance of your mix without overhyping frequencies.
How to Control Your Listening Volume
Using a dB Meter App like Decibel X helps you to track your volume.
Take short breaks as your ears get tired over time. Short breaks help you take better decisions
Pro tip: Low-Volume Check Rule – If your mix sounds god when played softly, it’ll sound great at any level.
Conclusion
This guide covers almost everything from choosing the right size, type and placement. I have also covered the common mistakes most beginners would do like I did which was ignoring room acoustics and listening at the wrong volume. After reading this you are perfectly ready to get the maximum out of your studio monitors. Just to summarize:
- Pick the Right Size – Match your monitor size to your room and needs.
- Go for Active Monitors (If You’re a Beginner) – Easier to set up and use.
- Prioritize Flat Frequency Response – Helps you mix with accuracy.
- Position Them Correctly – Follow the equal-sided triangle rule and keep them at ear level.
- Control Your Listening Volume – Keep it at 75-85 dB SPL for the best results.
Next Steps
Ready to buy? Check out our Best Studio Monitors Guide to find the perfect one for your setup or check out the perfect Set Up Guide to get the maximum performance. Also, to get out of any problems caused by studio monitors check out our Common Mistakes on Studio Monitors Guide.
