This page may contain links that earn us a commission at no extra cost to you. Click here to know more.
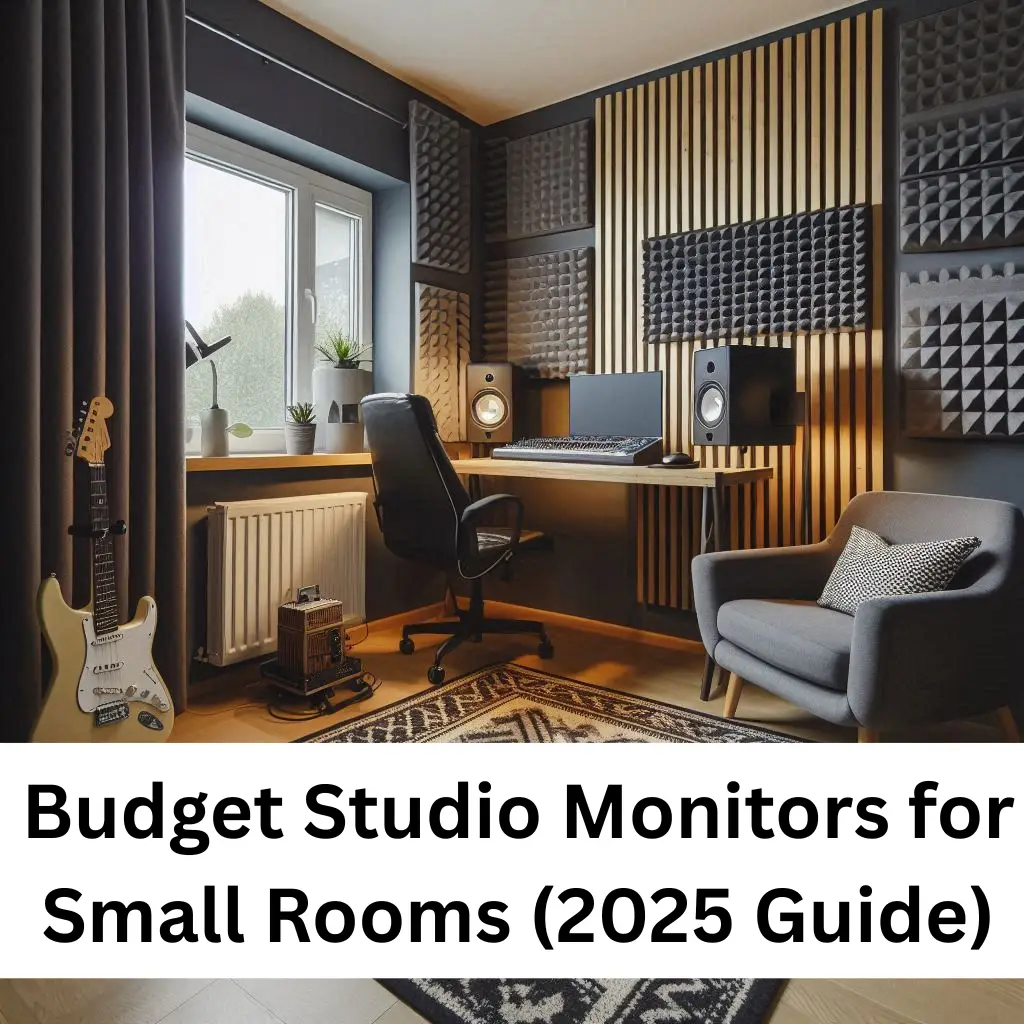
How to Set Up Budget Studio Monitors in Small Rooms for Accurate Sound
Struggling to get great sound from your studio monitors in a small room? This guide shows you how to optimize your budget setup for accurate mixing—even in tight spaces.
- May 11, 2025
Getting Great Sound on a Budget—Yes, It’s Possible
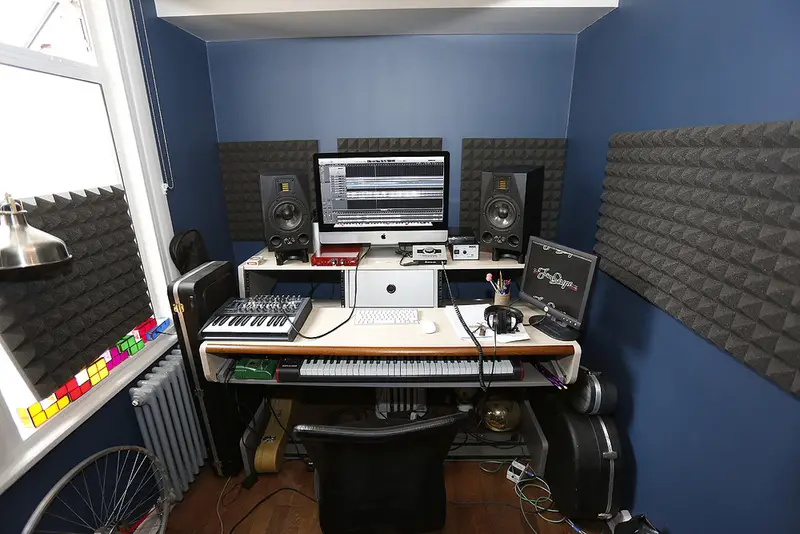
Setting up a home studio in a small room or bedroom can feel limiting—especially when you’re working with budget studio monitors. Getting accurate, balanced sound in a tight space isn’t just about the price tag; it’s about knowing how to use what you have to its full potential.
Whether you’re producing beats in your bedroom or mixing vocals in a compact space, this guide will show you how to optimize your studio monitor setup for the best possible results—without breaking the bank. And if you haven’t already picked out your monitors, check out our Best Budget Studio Monitors for 2025 to find the perfect match for your space and workflow.
Why Small Rooms Are Tricky for Studio Monitoring
Setting up a budget studio monitor system in a small room sounds simple — until your mixes start sounding wildly different everywhere else. Tiny spaces, like bedrooms or home studios, can play tricks on your ears. The real problem? You’re dealing with acoustics that aren’t always on your side.
If you’re shopping for affordable monitors, check out our full Best Budget Studio Monitors for 2025 guide to find models that perform better in small rooms.
Sound Reflections and Standing Waves
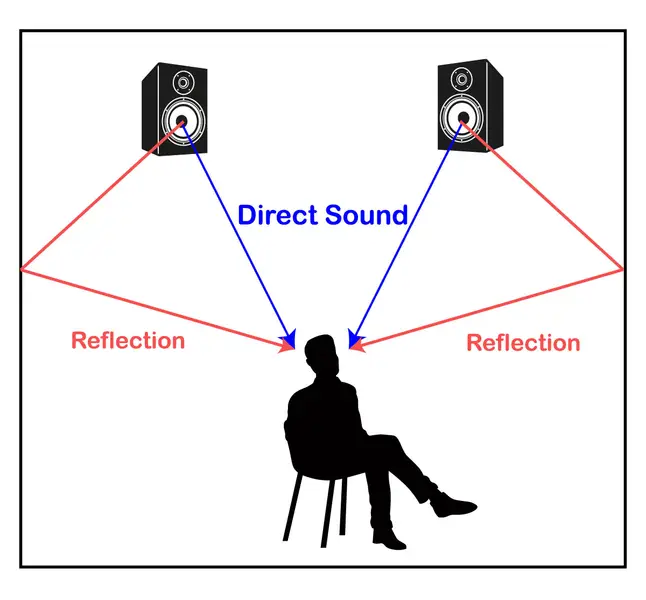
When sound waves bounce around tight walls and ceilings, they often collide and overlap — this creates reflections and standing waves. In small rooms, those reflections are much closer to your ears, causing phase issues, hollow-sounding mids, or a boomy low end.
🎯 Pro Tip: This is one of the biggest reasons why your mix may sound amazing in your room but fall apart in your car or on headphones.
👉 For more on these kinds of issues, check out Common Studio Monitor Problems & Fixes.
Placement Limitations in Tight Spaces
The smaller the space, the harder it is to follow ideal studio monitor placement rules. Chances are, your monitors are too close to walls, your desk is cramped, and you’re forced to sit right up against your speakers — all of which skew the frequency balance.
Even budget monitors that sound great on paper can’t fix a bad layout.
Choosing the Right Budget Monitors for Small Rooms

Not all studio monitors are created equal — especially when you’re working in a small space. To get the most accurate sound without overloading your room, you’ll need to be strategic with your gear choices.
If you’re specifically looking for affordable models that don’t overpower a tight setup, we’ve broken it down for you right here. You can also browse our full breakdown in the Best Budget Studio Monitors for 2025 guide.
What to Look for in Budget Monitors for Small Spaces
When space is limited, your monitor’s size and design play a huge role in how it performs. Here’s what to prioritize:
- 5-inch or smaller woofers: Larger woofers can produce more bass, but they often overwhelm small rooms with low-end buildup. Monitors with 3.5″–5″ woofers are a sweet spot for clarity without boominess.
- Front-ported or sealed designs: Rear-ported monitors tend to exaggerate bass if placed close to walls — a common issue in small studios. Front-ported speakers or sealed (non-ported) enclosures handle this much better.
- Compact cabinets: Smaller enclosures are easier to position on desks or shelves without compromising on stereo imaging.
If you’re dealing with excessive bass or unclear mids in your current setup, see our guide on Common Studio Monitor Problems & Fixes.
Recommended Models That Fit Small Rooms
Here are two solid options from our main guide that work exceptionally well in tight spaces:
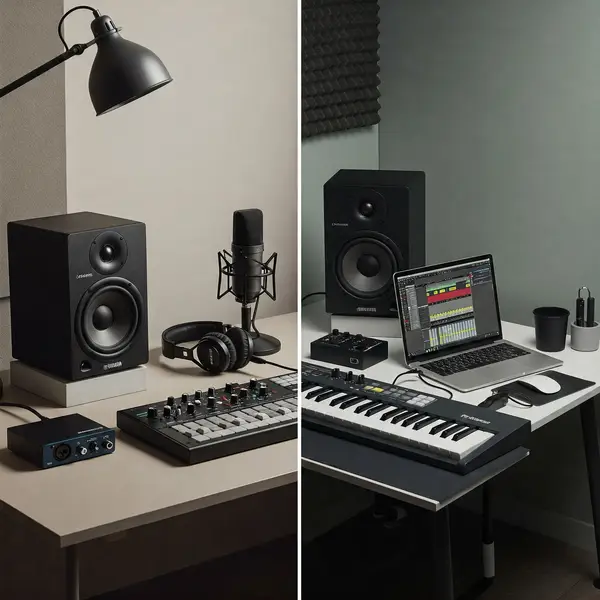
✅ Yamaha HS5
One of the best studio monitors in its class, the Yamaha HS5 delivers clean, honest sound with a tight frequency response — perfect for nearfield listening in small rooms. While it’s rear-ported, it performs best when placed a bit off the wall with some acoustic treatment.
✅ PreSonus Eris E3.5
The PreSonus Eris E3.5 is a true budget hero. Its compact size and front-firing port make it ideal for desktop setups or bedroom studios where space is limited. It won’t shake the walls, but it gives you clear highs and midrange at an unbeatable price.
How to Place Studio Monitors in a Small Room
Getting accurate sound in a compact space isn’t just about what monitors you buy—it’s how you place them. The way your speakers interact with your walls, desk, and listening position can either make or break your mix.
If you’re wondering how to place studio monitors in a small room, this guide has you covered with practical tips you can apply even if you’re working out of a bedroom or tight apartment setup.
For a full step-by-step breakdown, visit our Studio Monitor Setup Guide.
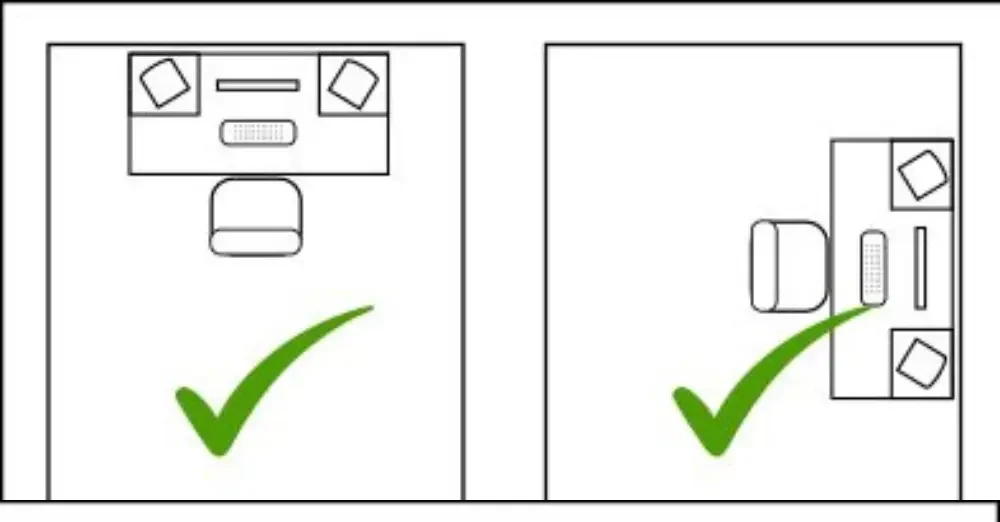
Wall Distance Matters
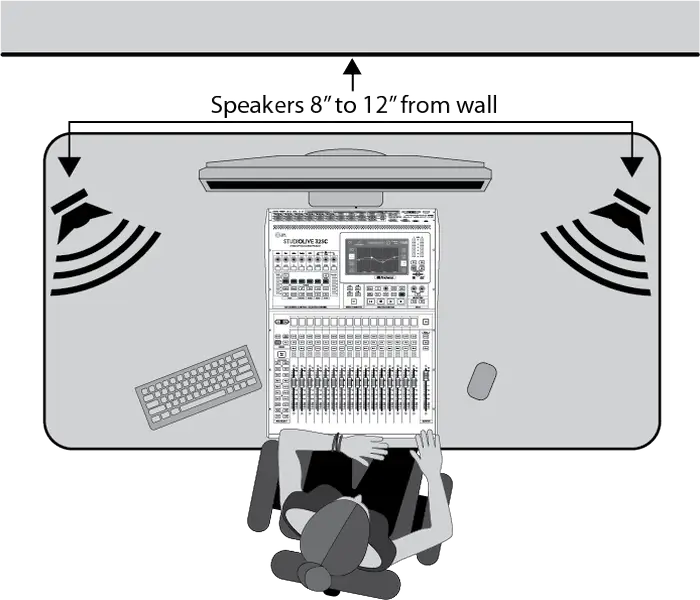
Your monitors shouldn’t be flush against the wall. In small rooms, placing them just 6–12 inches away from the wall can reduce low-end muddiness caused by boundary reflections. If you’re using rear-ported monitors like the Yamaha HS5, pull them out a little further if possible.
Ear-Level Alignment Is Crucial
The tweeters (the small upper drivers) should be roughly at your ear level when you’re seated in your listening position. If you place monitors too high or low, the stereo image and high-frequency response can suffer. Monitor stands or isolation pads can help here.
Follow the Equilateral Triangle Rule
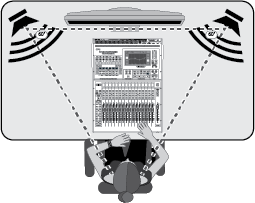
Your listening position and your two monitors should form an equilateral triangle. This means:
- The distance between the monitors = distance from each monitor to your ears
- Both monitors should be angled slightly inward, aiming at your ears
This rule gives you a well-defined “sweet spot” for critical listening.
💡 Pro Tip: Use masking tape to mark the ideal monitor and chair positions on your desk or floor for consistency.
Acoustic Treatment Tips on a Budget
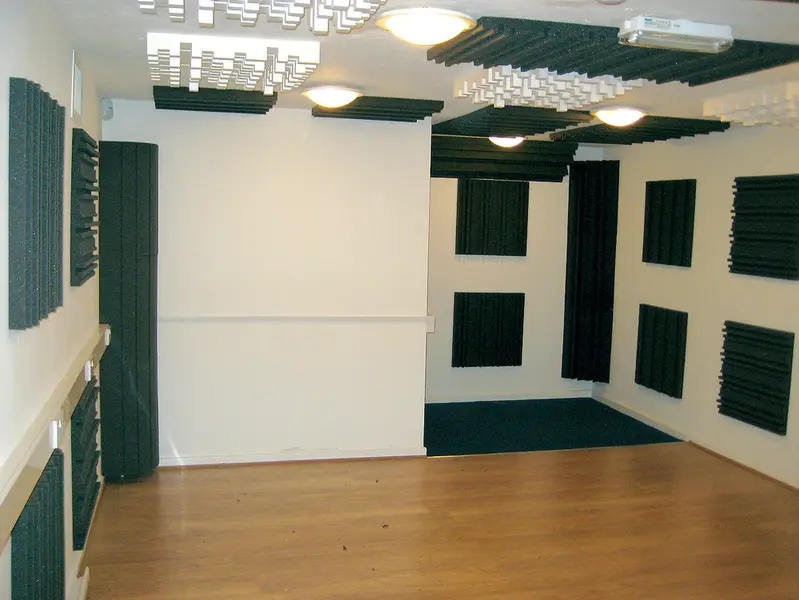
Acoustic treatment might sound intimidating (or expensive), but you don’t need to spend a fortune to control reflections and tame boomy bass in a small room. If you’re searching for cheap acoustic treatment for home studio, the good news is—you’ve got plenty of DIY-friendly options.
For a deeper dive into placement and room treatment fundamentals, check out our Studio Monitor Setup Guide – Acoustic Treatment Section.
Start with Absorption – Not Just Foam
Cheap foam panels may reduce flutter echo, but they often don’t absorb lower midrange or bass effectively. Try these budget-friendly solutions:
- DIY panels using Rockwool or Owens Corning 703 wrapped in breathable fabric
- Heavy curtains or moving blankets behind your monitors and mixing position
- Rugs or carpets on hardwood or tile floors to dampen reflections
Don’t Skip the Corners – Add Bass Traps
Corners are where low-frequency energy builds up. Use:
- Homemade bass traps made from dense insulation
- Rolled-up blankets or pillows stacked neatly in corners (temporary, but better than nothing)
Foam corner traps as a starter upgrade if you’re on a tight budget
Focus on the First Reflection Points
Place absorption panels:
- To the sides of your desk at ear height
- On the ceiling above your listening position (use lightweight panels or clouds)
- Behind your listening position to absorb reflections bouncing back
Learn more about setting up your room right in our Setup Guide on Choosing the Right Room.
💡 Pro Tip: Treat the room first, not the gear. Even budget monitors sound significantly better in a well-treated space.
Monitor Isolation & Desk Setup
In tight home studios, your desk can make or break your monitoring accuracy. Many beginners place studio monitors directly on their desk—without realizing that vibrations and surface reflections are muddying their sound. If you’re looking for monitor isolation pads on a budget, the good news is: you have simple and effective options.
Why Isolation Pads (or Stands) Matter
Monitors sitting directly on a desk transfer low-frequency vibrations into the surface, creating resonance and smearing your low-end clarity. Isolation pads and stands decouple your speakers from the desk, helping you hear tighter bass and clearer mids.
Here’s what works best in small rooms:
- Foam isolation pads: Affordable and effective for light monitors like the PreSonus Eris E3.5.
- Adjustable monitor stands: More expensive, but give flexibility in height and angling—great for monitors like the Yamaha HS5.
You’ll find more budget-friendly picks in our Best Budget Studio Monitors guide.
Desk Setup Tips for Small Rooms
If you’re stuck using a desk, follow these tips to minimize problems:
- Place your monitors so the tweeters are at ear height.
- Keep monitors at least a few inches from the wall to reduce bass buildup.
- Use a non-reflective surface (or place a small rug or mat under the monitors if stands aren’t available).
- Angle monitors inward following the equilateral triangle rule—your head and the two speakers should form an even triangle.
Want a complete visual guide? Don’t miss our Monitor Placement Tips for small rooms.
💡 Pro Tip: Even cheap foam pads can drastically improve clarity. They’re a small investment with a big return.
Common Mistakes in Small Studio Setups
Getting your studio monitors into a small room can feel like playing Tetris—but squeezing them into the space isn’t the same as setting them up right. Small rooms often exaggerate small mistakes, especially when it comes to studio monitor placement.
Let’s break down some of the most common errors that can wreck your sound, even with the best budget monitors.
Placing Monitors Too Close to Walls or Corners

Putting your monitors right up against the wall? You’re not alone—but it’s a classic mistake.
Doing this creates excessive bass buildup and muddiness. Try to leave at least 6–12 inches of space behind your monitors, and avoid placing them in corners where low-end frequencies tend to get trapped.
🎯 This is covered in more detail in our guide on Common Studio Monitor Problems & Fixes.
Poor Angling or Height
Monitors should be angled inward so the tweeters are pointing directly at your ears. If they’re aimed straight ahead (or worse, up at the ceiling), you’ll miss key frequency details. Your ears should also align with the tweeters—use stands or foam pads to adjust height.
📚 You’ll find practical positioning tips in our Studio Monitor Setup Guide.
💡 Pro Tip: Even the best monitor can’t perform well if it’s poorly placed. Spend time getting the basics right—it pays off.
Final Tips for Best Sound on a Budget

You don’t need a $5,000 setup to get clean, reliable sound—just some care, calibration, and a bit of patience.
Even without high-end gear, you can still train your ears by listening to familiar reference tracks and comparing them across your mix. This helps you catch tonal imbalances more effectively.
If you want to go the extra mile, try using basic tools like pink noise and a smartphone SPL meter to calibrate your listening levels by ear. It won’t be lab-accurate, but it will drastically improve your results in a small room.
🛠️ For a deeper guide on setup and calibration, check out our Studio Monitor Setup Guide.
FAQs About Studio Monitor Issues
Should I use 5" or 3.5" monitors in small rooms?
It depends on your room size and mixing needs. 5″ monitors like the Yamaha HS5 offer better bass response and are suitable for slightly larger rooms or if you have some acoustic treatment. 3.5″ monitors, such as the PreSonus Eris E3.5, are ideal for very small spaces or desktop setups where space is limited. They provide clear mids and highs but may lack deep bass.
Can I mix professionally in a bedroom studio?
Absolutely. With proper setup, acoustic treatment, and critical listening, you can achieve professional-quality mixes in a bedroom studio. Many successful producers have created hit records from home setups. The key is to understand your room’s acoustics and make informed mixing decisions.
How far should budget monitors be from the wall?
It’s recommended to place your studio monitors at least 6 to 12 inches (15 to 30 cm) away from the wall to minimize bass buildup. If possible, increasing this distance to 2 to 3 feet (60 to 90 cm) can further reduce low-frequency exaggeration. Avoid placing monitors directly in corners, as this can cause excessive bass resonance.
Should I calibrate my studio monitors?
Yes — basic calibration ensures your monitors output balanced levels.
- Use pink noise or reference tracks to match speaker volumes.
- Adjust EQ settings or room treatment to fix frequency imbalances.
Check out our Studio Monitor Setup Guide for calibration techniques.
What gear should I buy to avoid common issues?
- Balanced audio interface
- High-quality cables
- Isolation pads or stands
- Cable tester
You’ll find gear recommendations in our Studio Monitor Buying Guide and brand reviews.
For more detailed information on setting up your studio monitors, refer to our Studio Monitor Setup Guide.
Conclusion: Big Sound Starts with Smart Setup
Getting great sound in a small room doesn’t require a huge budget—just smart decisions. From choosing the right budget studio monitors to understanding placement and acoustic treatment, small tweaks can lead to major improvements in how your mixes sound.
Whether you’re just starting your home studio or looking to fine-tune an existing setup, investing time in the setup process pays off. Remember: good gear matters, but using it correctly matters even more.
For more help choosing the right monitors, check out our Studio Monitor Buying Guide and explore top brands in our Studio Monitor Brands Comparison.